With more and more people sharing photos online like IG, everybody wants a nice looking yard.
The yard can become an expression of the home owner. So having a yard that is nicely landscaped, can be an elegant touch that will add value to the entire neighborhood.
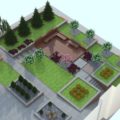
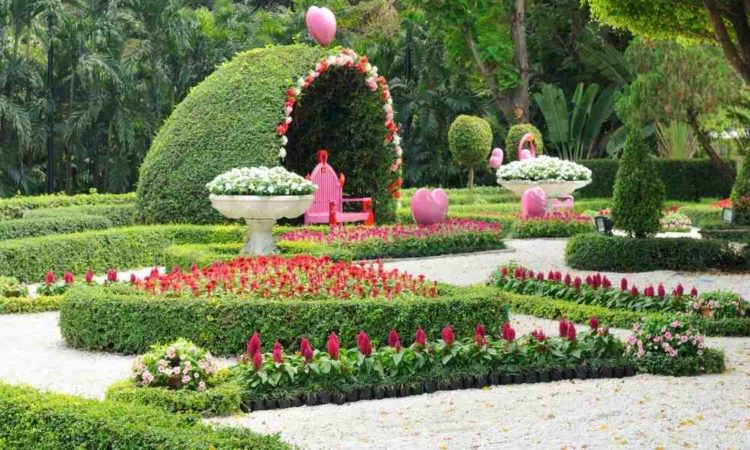
The goal of this article is to turn your outside area into a beautifully landscaped plot that can be used for many great activities. A place to be enjoyed when you have guests over or a pleasant place to relax.
When choosing to landscape your could consider it a masterpiece or work of art. It depends on what type of décor you want in your yard and how you want it to look when it is finished.
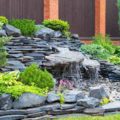
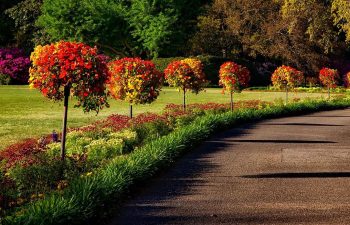
Some landscapers may include flowers, trees, shrubbery, rocks, blocks, fountains, ponds and walkways. Other individuals might find a focal point in their yard and only landscape that area.
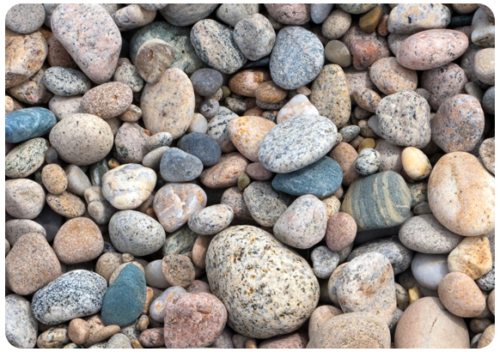
“Rocks can add some texture to a garden landscape”
This could be a flower bed, garden, pool, walkway, porch, driveway, or patio. Not all landscapes will look the same because not everyone has the same tastes.
A blank yard is like a blank canvas. The artist will then decide what objects fit in the right locations for a finished picture. Landscaping for the first time is not as easy as it may seem.
There are many steps required to begin such a detailed project.
Consider your Budget
Budget – Key Points
- Set a budget before you start
- Shop around for good deals
- Try to get wholesale prices
- Get to know your local supplies
- Clearly communicate your needs
- Don’t shop at the first place you visit
It’s important to figure out just how much money you can spend on the landscaping project. A budget is a good place to start. Knowing the amount of money that can be spent will help in determining the items you can buy.

“Do your numbers and plan your expenses”
It’s good to really think the financial burden through before beginning the project. The items needed for a landscaping project can add up quickly.
Having an informed idea of the cost will assist with determining your landscaping needs. It is better to have a general idea of what can be spent instead of having an unfinished landscape.
Research can begin after the budget has been set. It is a good idea to know the price items are going to cost before purchasing anything. It’s generally a good idea to shop around at different businesses. Some may have sale items you’re interested in or may offer a bundle deal.
A wholesale purchase is also a great way to get items cheaper than full price. The more that you shop around, the more items you may be able to purchase to stretch your budget.
Working on your project in small steps can also give you time to save the funds for the entire project. If you are spacing your landscaping project; let your suppliers know this. They may be offering deals or specials running around the time you want to start that part of the project. Maybe you can get the items that you need at cheaper prices.
Never settle for the first place you look. The more research you do on each item the better chance you have to get it cheaper.
Click Here For Some More Budgeting Tips…
Planing the Project
Planning – Key Points
- Create a list of items you need
- Sketch out your design
- Make a list of places to purchase
1. Create a List of Items to Purchase: Being able to shop around will not only save you money but can also help you plan your project. Keep a list of the items you want for your project.
“Create a checklist of supply’s needed for your project”
List what stores have these items and how much they are. You may need to shop at different places to purchase everything in your plan list. The list will help you remember what stores has what items and how much each item is.
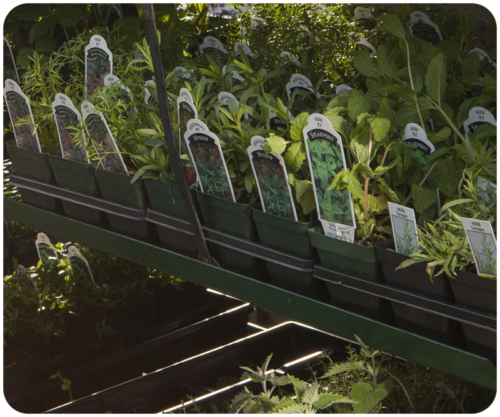
Be sure to check the weather zone of the greenery before purchasing to ensure it will grow in your climate. Some flowers, trees, and shrubs do not grow as well in certain geographical locations.
When it comes time to purchase your items, the list will make it really easy.
2. Sketch out the Project Design: Once you have written down the products you want to purchase; begin a plan of your landscape. Get a picture of your yard and decide where you want to put everything you are buying. You can draw up your plan on paper or use your computer to design it.
The plan will make your landscaping project go quicker and smoother. Take your time and plan it carefully. This will save you from having to change it later. Do not make a final decision on your landscaping plan until you are 100% positive that is how you want it to look.
If you want thousands of various landscaping plans and guidelines. You will get unique designs for your garden, front or back yard. They have a style for almost every yard, environment, country, preference and trend.
Purchase your Supplies
Purchasing – Key Points
- Check you plan for the item you need
- Tally up the items you need
- Work out where to purchase
- Calculate the costs of all your items
- Plan your route and what will be purchased at each store
- Store and water any purchased plants
Now that you have a list and a plan, it’s time to purchase. We first need to go back to your plan and figure out how much of each item you will actually need. Check your plan list for the items you need to purchase. Beside each item place a number of the amount you need.
Keep referring to your plan while you make your list. Being able to refer to the plan will help you to not miss any of the items you want to use. Once the list is complete, double check the items and numbers.
It’s always a good idea to double check in case you miscounted.
Once you are finished with the number of items you will need check your list of business that carries those items. Figure out the cheapest ones, to ensure you stay on budget. Once you have the list ready you can look it over to see if more than one item can be bought at the same business. This will ensure that you are not forgetting anything while shopping.
“Time to go shopping for supply’s”
The next step is to calculate the cost of each item and the amount needed. Once you have calculated each item, add them up. This will help to keep you in the budget range that you had set earlier.
Do not forget to add in tax if there is any in your area. Double check your calculations to ensure that you have an accurate total. Look at your budget and decide if you have any room to add any more items to your project.
If you’re not sure, refer back to your plan to see if there is an item you forgot or may need to assist with the project. If you do not need anything else and are under budget, then you are off to a good start.
It is time to go shopping. Plan your route to each store. Take your lists with you. This will make it easier to purchase everything without leaving something out. This could take some time depending on how many places you need to visit to purchase your landscaping items.
Check the prices at the store to ensure they match the price on your list. You may be able to find some last minute deals or markdowns that could save you more money. Once you are completely done shopping you can unload everything in a safe area.
Check to see if you have plants or flowers that need to be watered regularly. You do not want to start a landscaping project with dead flowers, trees, or shrubs.
Utilities
Utilities – Key Points
- Check the position of your utilities before you begin digging
After you have constructed your plan it is important to know where your utilities are. You can have them marked by the utility companies to ensure you do not dig or damage anything.
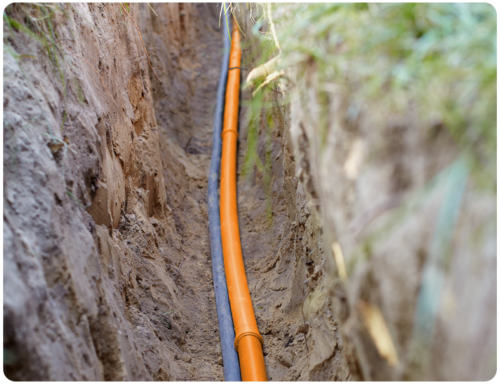
“You need to know where the underground utilities are located”
This is especially important when doing any digging at all. It will save you time and extra expenses that you had not budgeted for.
When you dig without knowing where the utilities are it could cause injury or problems for neighbors who may be linked to those lines.
When this happens, it can cause a delay in your plans. You could also have to pay out of pocket to fix the utilities that you damaged while digging.
Plan ahead and have them all marked before you begin landscaping. If there is a utility in the vicinity then you may need to move a few things around. This is better than any unexpected issues that could occur if you had not checked before digging.
The changes could be the difference of moving an item a few feet from the original spot which is a minor adjustment. Always think ahead and take precautions to ensure that no one gets hurt.
This project should be a fun experience and not a disappointing problem.
Working the Plot
Working the Plot – Key Points
- Access the amount of work require
- Remove all objects that are not required
- Mark out the plot from your design sketch
- Place all your items in their places
- A good visual layout helps you stay on track
It is a good idea to begin your project with a good night’s rest and a clear mind. Make sure you have plenty of time and nothing planned. This could take a good bit of time. Some landscape projects may need to take days or weeks to complete.
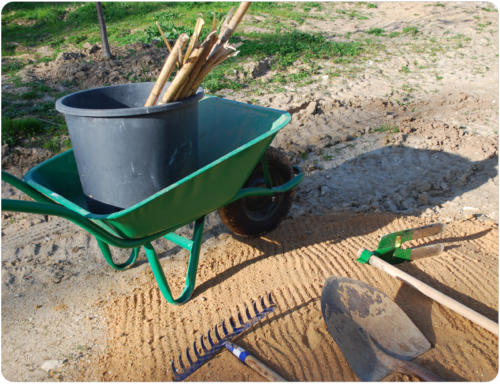
“Get our the Garden Gear and let’s get started”
The amount of time depends on the size of landscaping you want to do. The time also depends on how much work is needed to accomplish the end result. Now that you’re ready to start your project you can begin by plotting.
Take each item that you have purchased out into the yard. Set each item on the ground in the area that you chose in your plan. This will help you to get a good look at what you’re about to accomplish.
When placing plants or flowers remember that they get bigger. Take this into consideration when placing plants. Place blocks or other material on the ground as well. Make sure what can be placed is in the appropriate spot.
This will help you visualize what your landscaping will look like in the end. You will be able to tell if any changes need to be made. If there are items that need to be moved do it before you begin with the landscaping project.
Doing this also helps you not to forget or leave out any items. If you want a flower bed in one area of the yard place the mulch and flowers in that area. Set them in the right spot.
A visual of what you’re accomplishing will help determine if you want to make any last minute changes. Instead of needing to dig the plant back up you can move it to a different location. It is easier to move a plant before it is officially put in the ground.
When it is time to put the plant in the ground you will already know that is where you want it.
If you’re putting in a walkway, then lay out the block as if you were putting it together. When it is time to start on the walkway you can lift up a block, dig, and place it back in the spot.
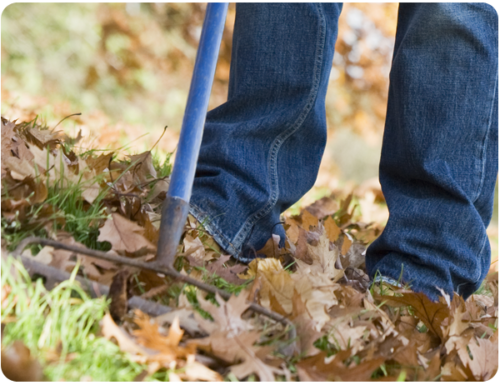
“Start clearing the area to be landscaped”
You can use a level to ensure the walkway is even. Being able to visually see what you are doing helps make the project quicker and easier. A plot can be useful if you have to take a break and come back at a later date to finish.
That way, you won’t forget where you wanted an item and will know what needs to be done.
A good visual and layout of your landscape can help determine if you need to remove anything from the yard. Things that may need to be removed include roots, dead trees, brush, tree stumps and old walkways.
If you find that this needs to be done go ahead and clear out the unwanted items. Doing this now will save time and unnecessary problems when you begin to bring your landscape to life.
Free your yard of objects not included in your plan. Once that is complete you are ready to begin. You can now start the masterpiece.
Time to Start Planting
Planting – Key Points
- Position your plants accordingly
- Dig out an appropriate hole for the plants
- Gently spread out the roots
- Back fill are required
- Add mulch and water
It is important to know what type of sun level the plant requires. A plant that is full sun should not be placed in a shaded area. The plant may not grow very well.
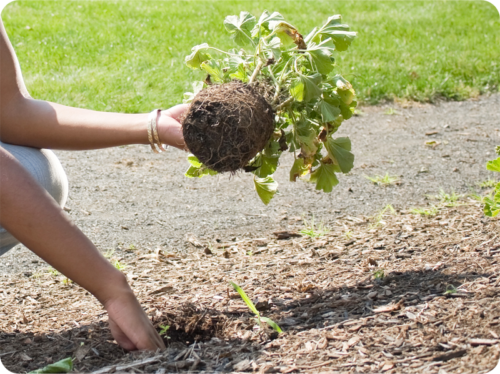
“Time to start digging holes and planting”
If a shade plant is put in a full sun or partial sun area it could die. If the plant did not come with a sun level you may want to look that up.
It is a good idea to double check each plant and to see if it needs to be moved. It is easier to switch out plants before you have them planted in the ground.
The holes can be dug to put the plants in the soil. The hole for your plant may need to be bigger than the plant. A bigger hole can help the plant expand and have room to grow.
The size of the hole will depend on what you’re planting. A flower may not need near as much space to grow as a large shrub or tree. If the plant or flower came with planting information it is best to refer to it. Spread the roots out without breaking them off.
Place the item in the dirt and make sure the hole is the right size for the plant roots. Ensure the plant fits into the hole comfortably and has room to grow. Once you have determined the greenery was planted properly cover the roots up with dirt.
You may need to pack more dirt around bigger plants. Ensure that the roots are not showing in the dirt.
If you want to add mulch you can do that now. It is best to put approximately four inches of mulch around your plants. If you add more than four inches it could cause mold to grow on your plant.
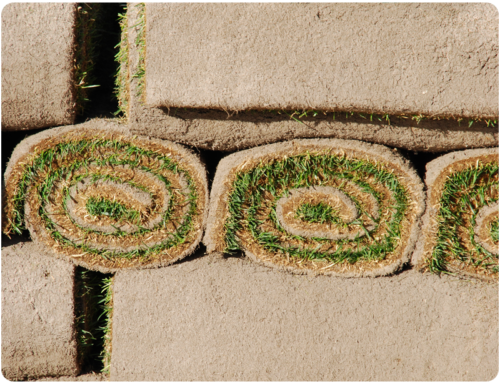
“Grass is a great way to finish large areas”
The mulch will keep the dirt cooler, prevent weeds from growing and hold more moisture. Try to keep the mulch off the plant stems because most of the stems don’t care for it.
You may need to water your plants after they are in the ground. It is a good idea to water the plants of an evening time. Be careful not to over water them. Over watering can cause it to die, or not grow.
Too much water can cause the roots to become waterlogged. The plant may come with these instructions. If you’re not sure it is good to research water limitations.
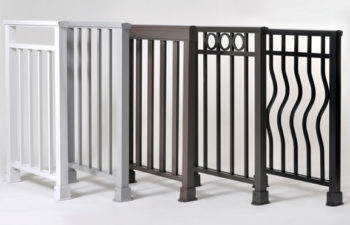
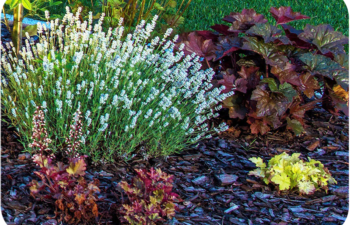
Mulch can give the flowerbed a different look and help it stand out in your landscape. Many flower beds have borders around them. The borders or outline can be created in a different material.
Landscaping borders can be constructed out of landscaping timber, block, logs, rock, bricks, lights and other items. A border can be used around trees, flowers, shrubs, gardens, porches, driveways and sidewalks. It gives the flowerbed a nice touch to your whole landscape.
A landscaped yard with a border can also become a focal point.
The Landscaping Project
There are several ways to begin a landscaping project. How you begin depends on your plan. You should take into consideration the area you are working with. You are not going to want to trample over the landscape to get to another area of the landscape.
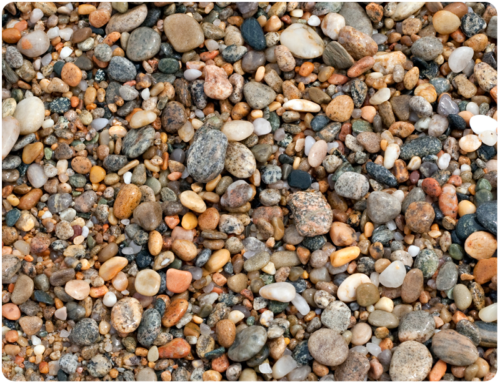
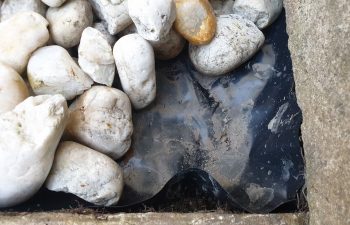
“Other elements like pebbles can be added for extra effect”
In order to determine the best place to begin there are some factors to consider. If you have a lot of digging to do in different areas then you may want to get that out of the way first.
This would be considered the bigger portion of the landscaping. Flower beds can be done last if possible. Flowers do not take as much effort as other landscaping needs.
If you are putting in a pond, walkways, or other bigger projects you may want to do these first. If you need to dig deep holes for trees or shrubs then this could also be considered a bigger project.
Once you have finished digging and installing bigger objects in your yard then you can begin with other smaller plants. To begin a flower bed, first clear out the area. Get rid of any roots or weeds that may be in the soil.
You can place your flowers back in the spots you originally had them for preparation. Read the label on the flower to know how far down to dig the hole. This will also tell you how far apart the flowers need to be. It is important to follow these instructions so that the flowers will look their best.
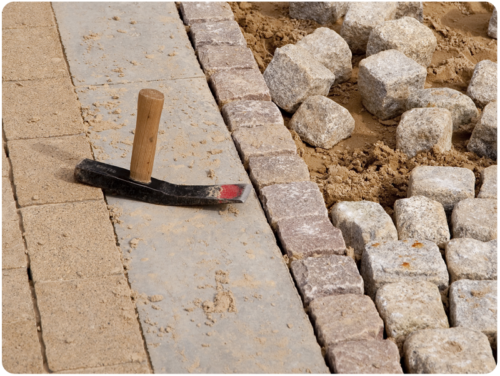
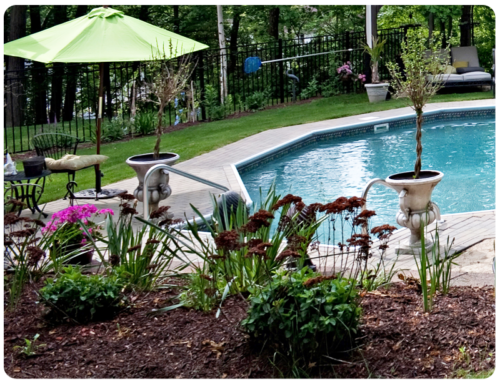
“Paving some areas adds function to certain areas, EG: Around a pool”
A landscaping plan that does not include big projects can begin differently. You may want to start at one side of your yard and work your way to the other side. This will help you see your masterpiece coming together. It can keep you from stepping on any finished landscaping or tearing it up by accident.
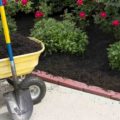
This is also important if you’re using equipment or other items like a wheelbarrow. There is less chance of running over or dropping something on the finished section of the yard.
Being able to start at one side and working your way across your yard is very beneficial. In case you have to take a few days off from your landscaping project you will know exactly where you left off.
The Masterpiece
Once you have finished your landscape project you can give it a final look. Make sure that everything is where you wanted it to be. This will allow you to notice if there are any missing pieces or leftover items.
After you have inspected you have inspected the landscape; you can admire the work you have done. A completed landscape project is something to be proud of.
Up Keep
The weather can cause issues with plants. Check the plants to make sure the wind or rain is not uncovering the dirt. This can be done when you water them. Remove weeds and other items that may be growing near or around your plant.
“The end result”
Other greenery can take away the room the plant needs to grow. A plant that grows taller than your plant may block the sun.
You also don’t have to spend a lot of money on the upkeep of your garden.
Dramatically increase the worth and appeal of your home with a few simple and inexpensive approaches by getting the Ideas4Landscaping videos and guidelines.